RainShade Design and Installation Service
Analog model compute, Precision fabrication, Elegant installation
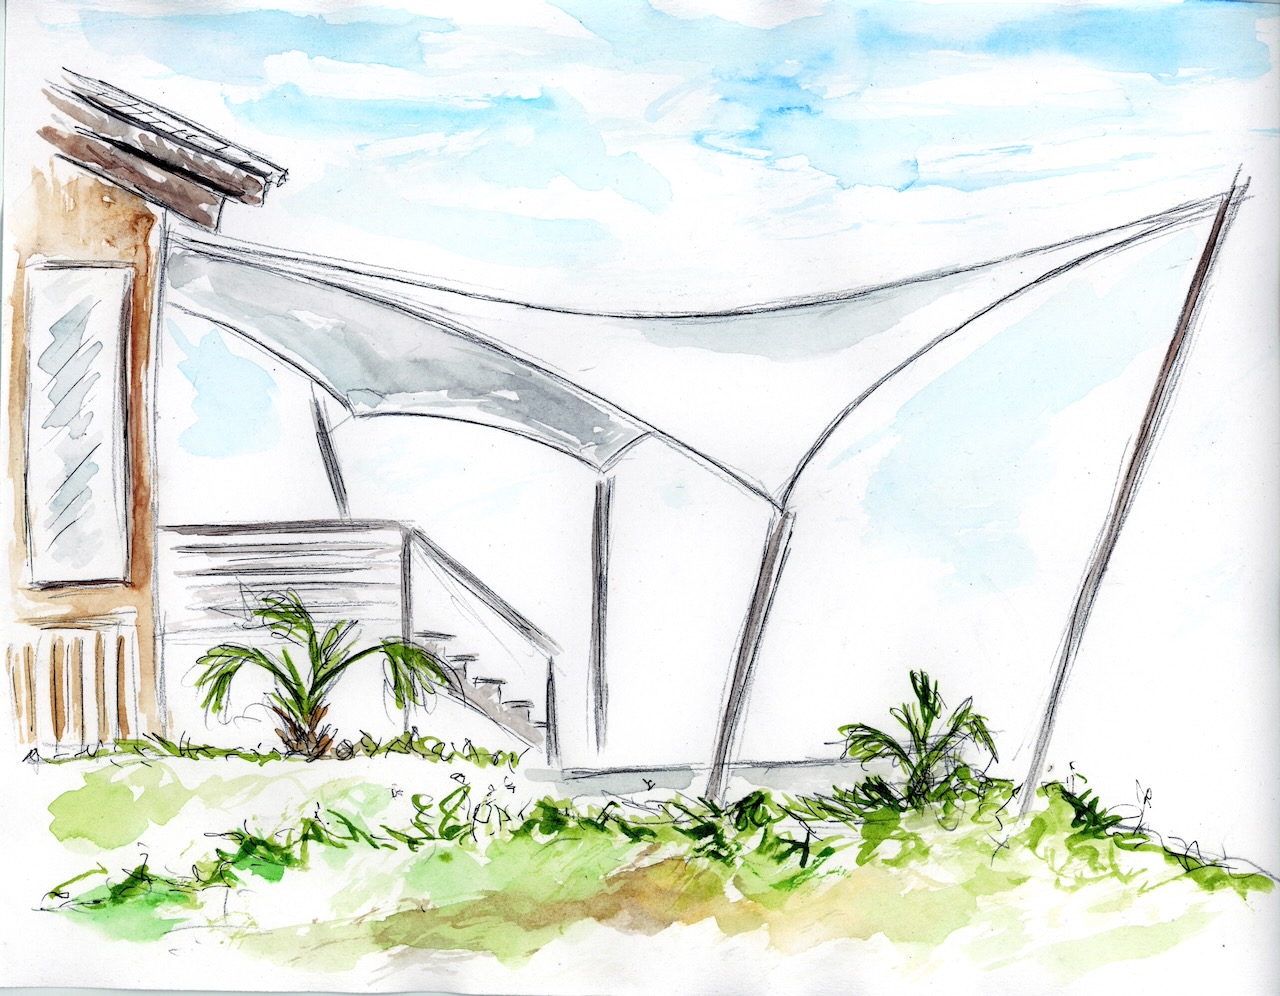
It starts as only a concept
But our fantasy to reality conversion ratio is off the charts!
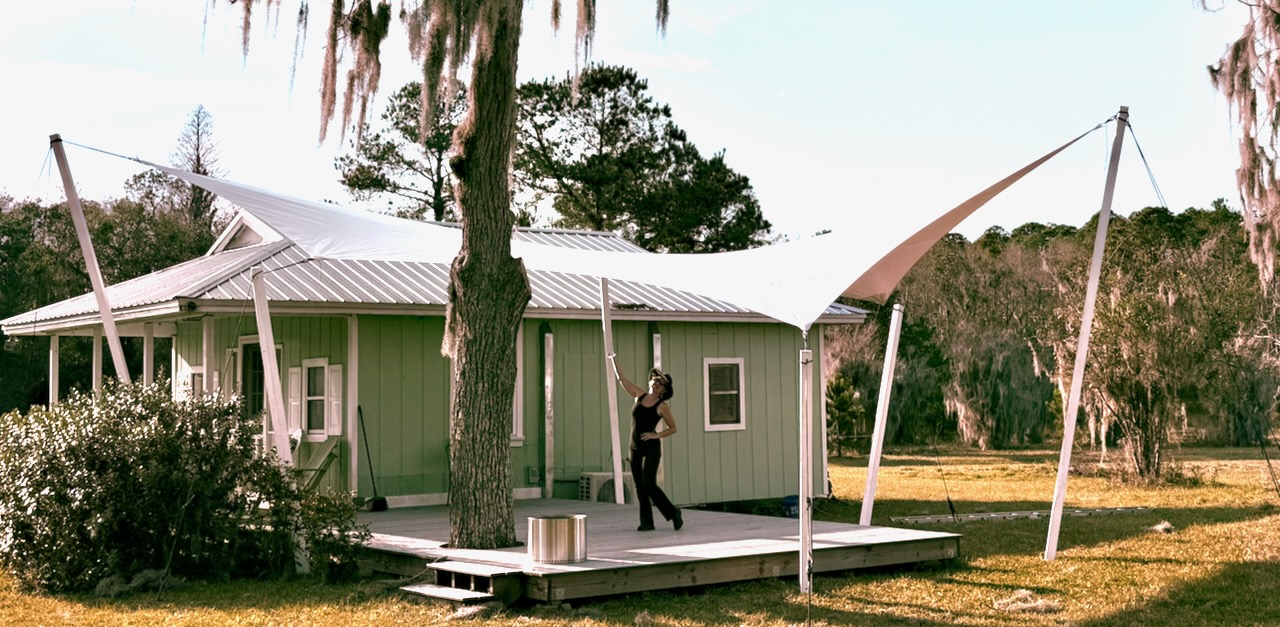
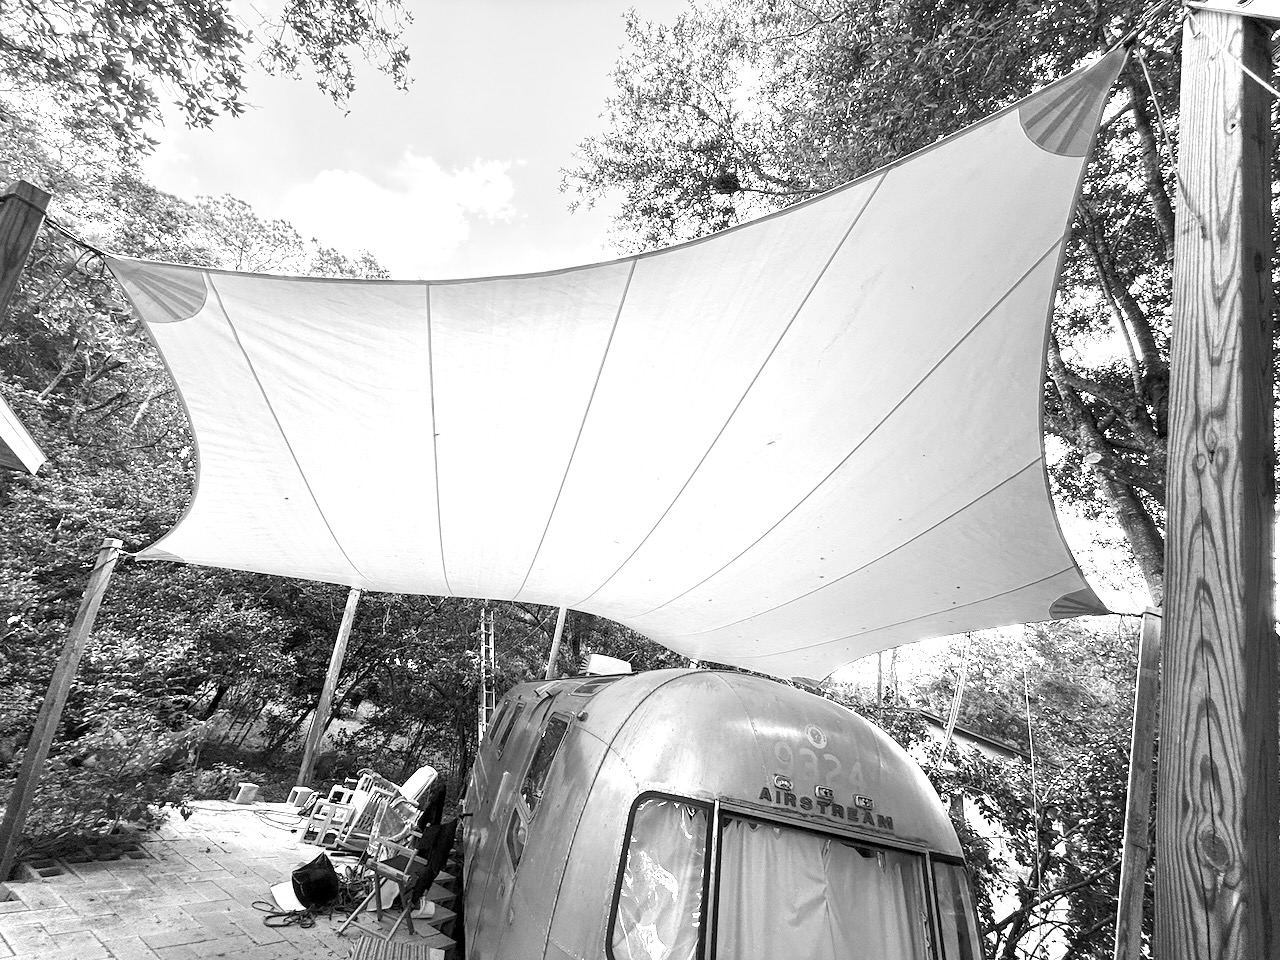
Installing RainShades
Installing WindFire Designs RainShades
We do all this
but in case you were curious
- Plot anchor and footer positions in real life from the model onto the site
- Lay out the poles and anchors
- Drive ground anchors and any anchors into existing structures
- Place footer blocks, anchors, and elephant feet
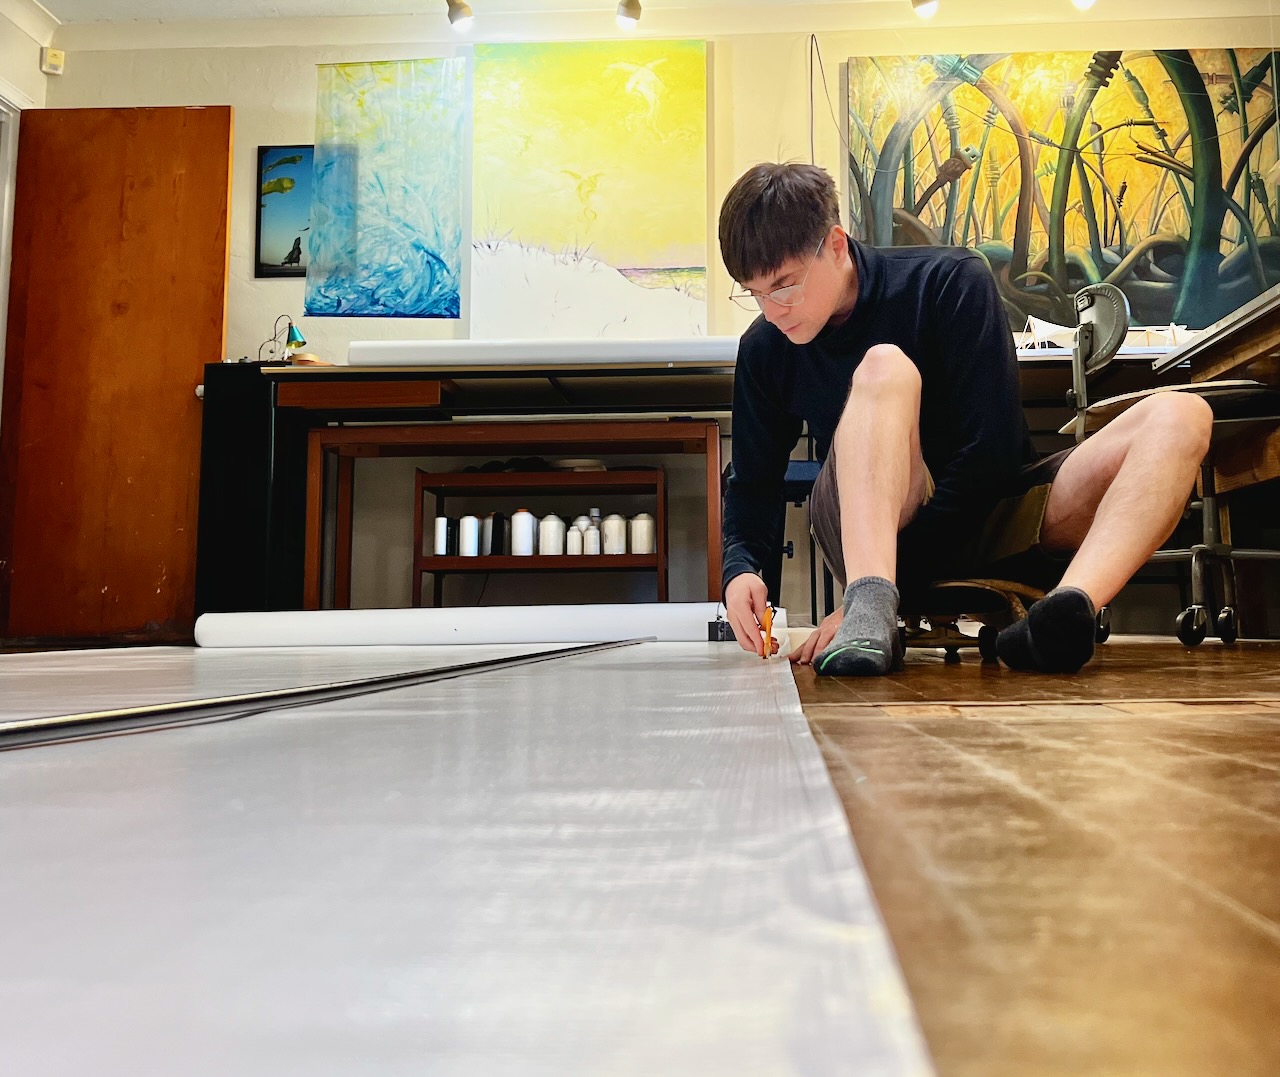
- Lay out the shade panels, making sure they are protected from abrasion on any rough surfaces
- Attach lines to posts and lines to anchors
- Hoist main posts into temporary position
- Attach RainShade points to line clips
- Push all posts up and into place
- Check post and line angles against model and each other
- Begin the tuning process, very like truing a bicycle wheel
- Final tensioning, adjustments, and finalize footer anchors
- Final tuning again, followed by more tuning, hey we have high standards!
- Enjoy your new RainShade!
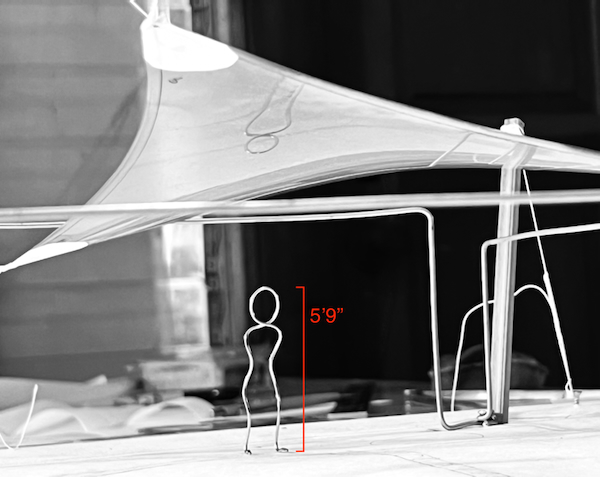
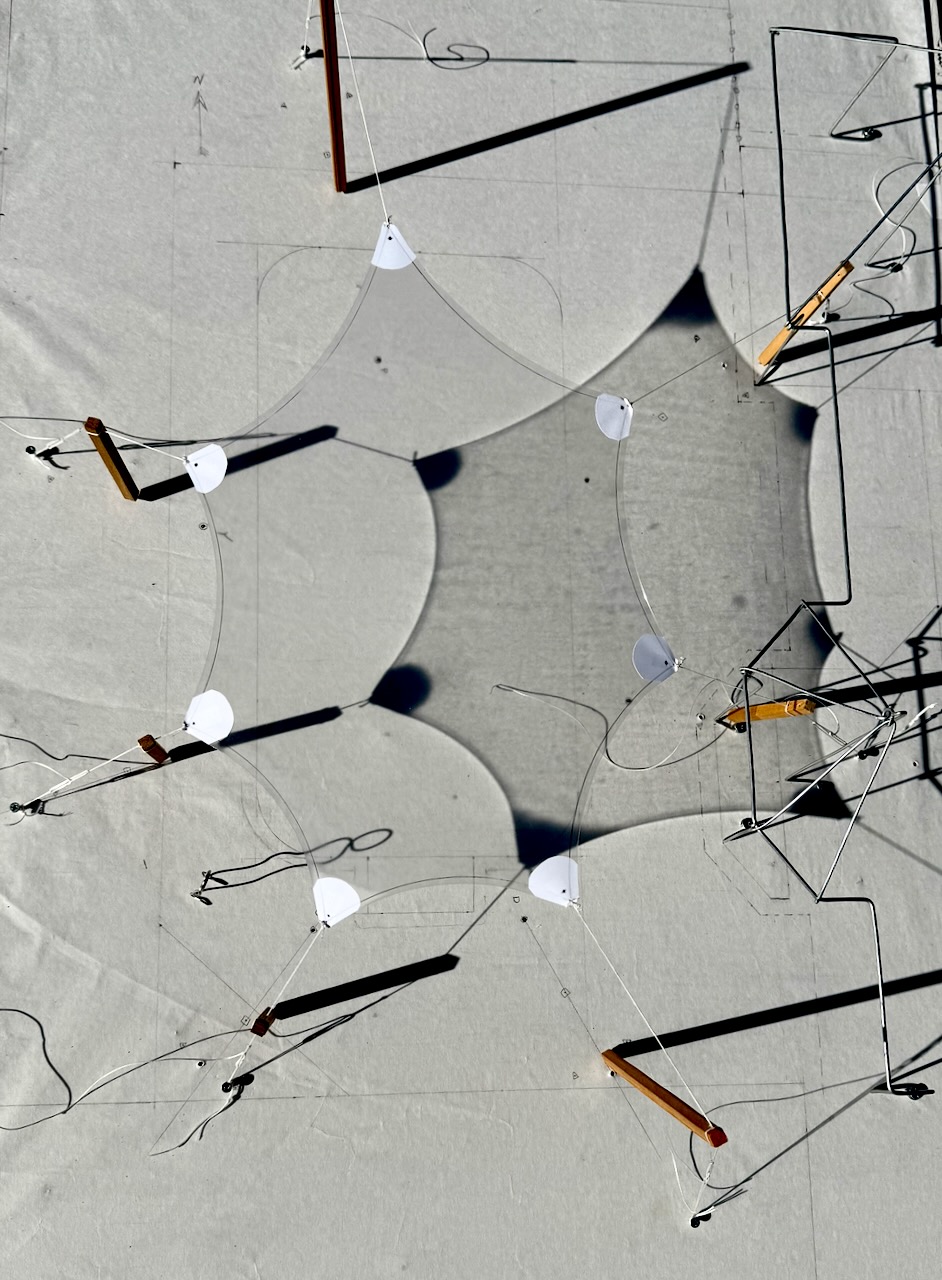
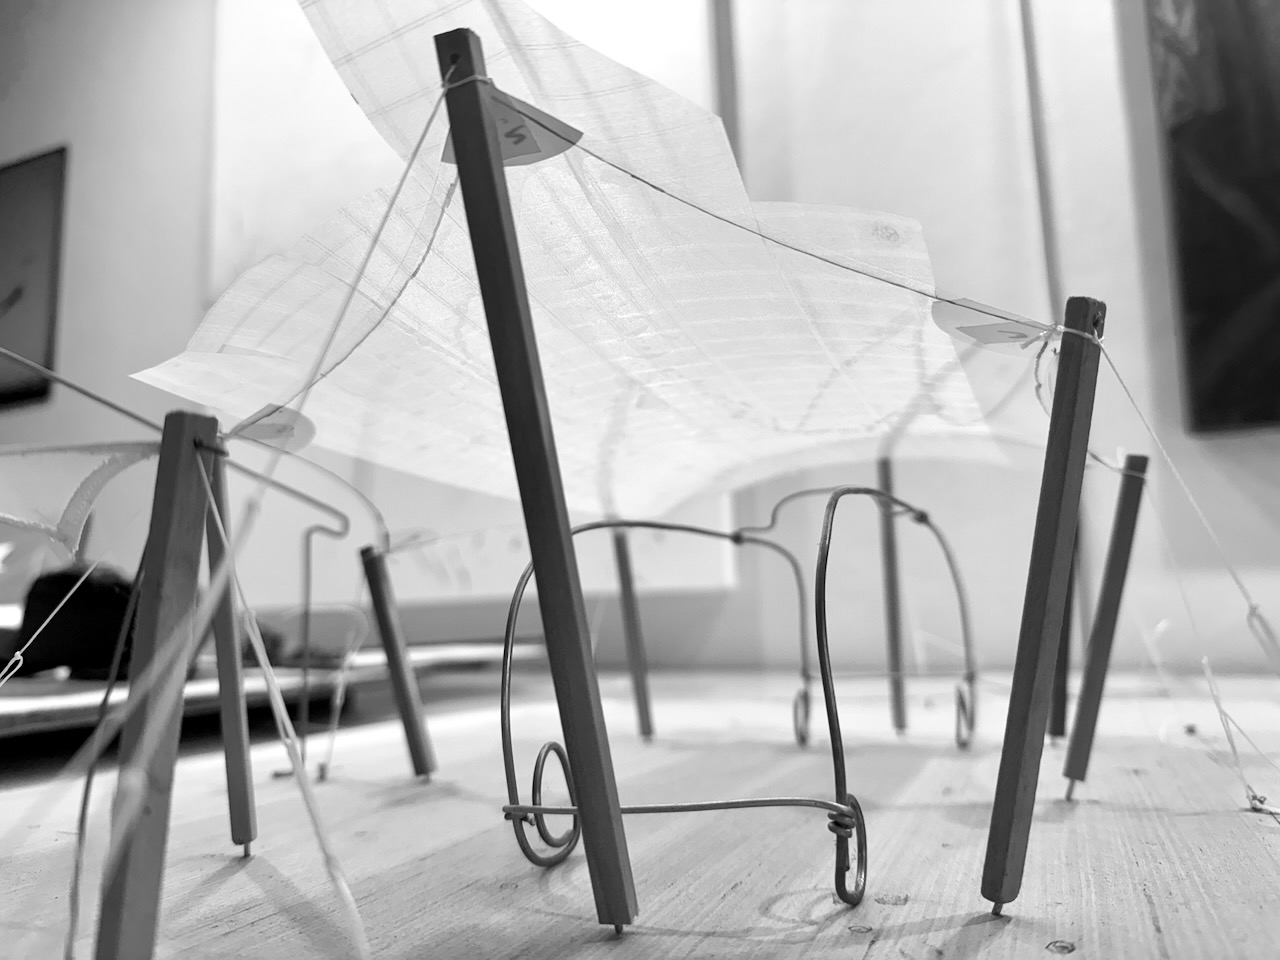
Our models are everything
They are, at once, both miniature dream worlds
and
sophisticated analog computers.
The Process
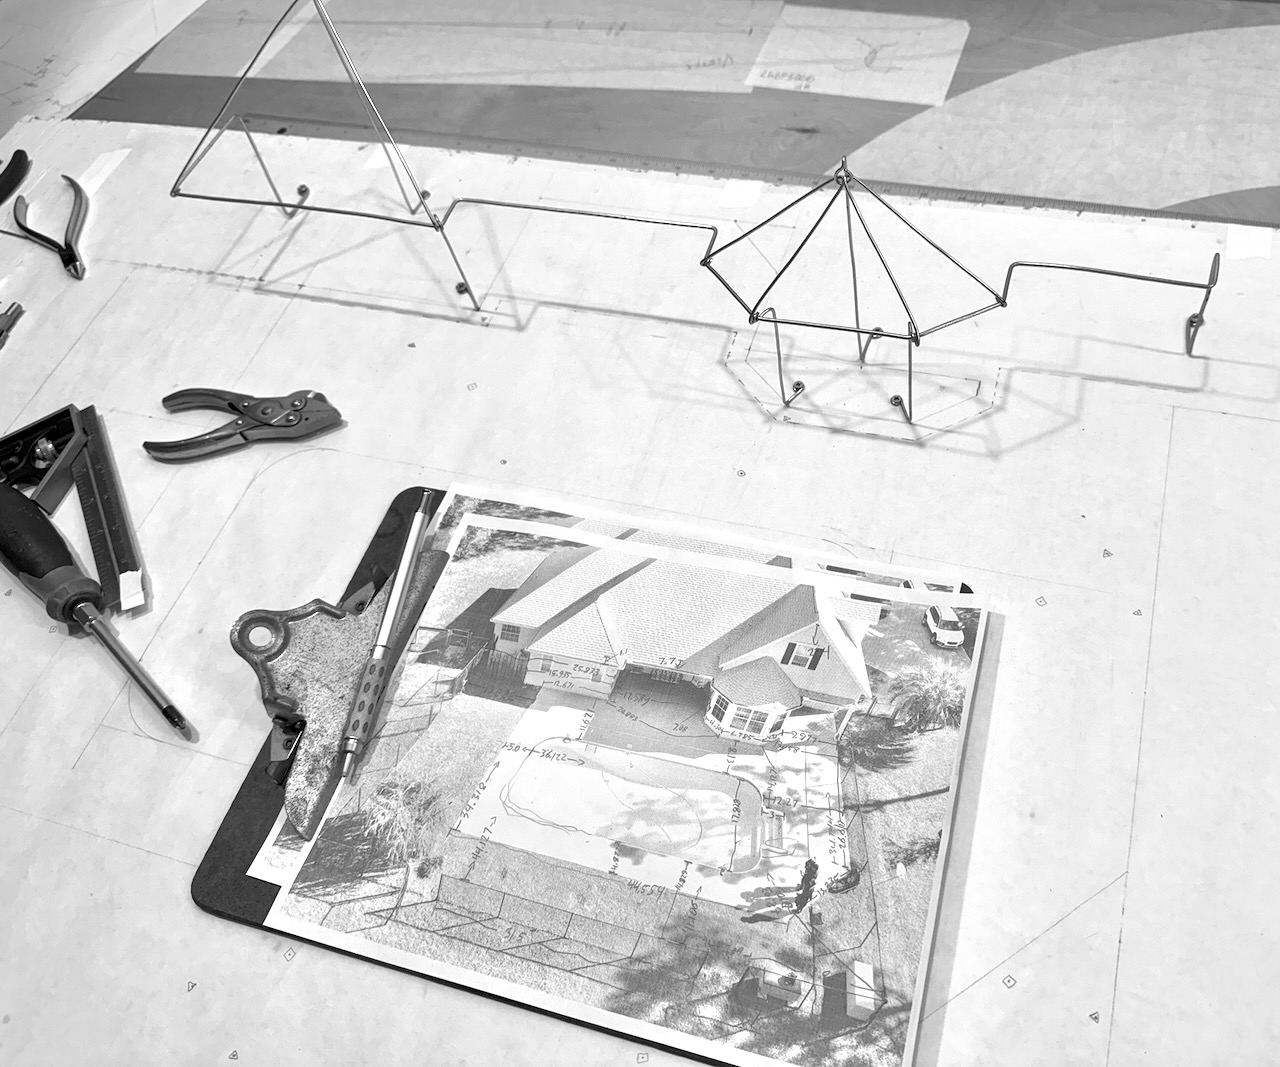
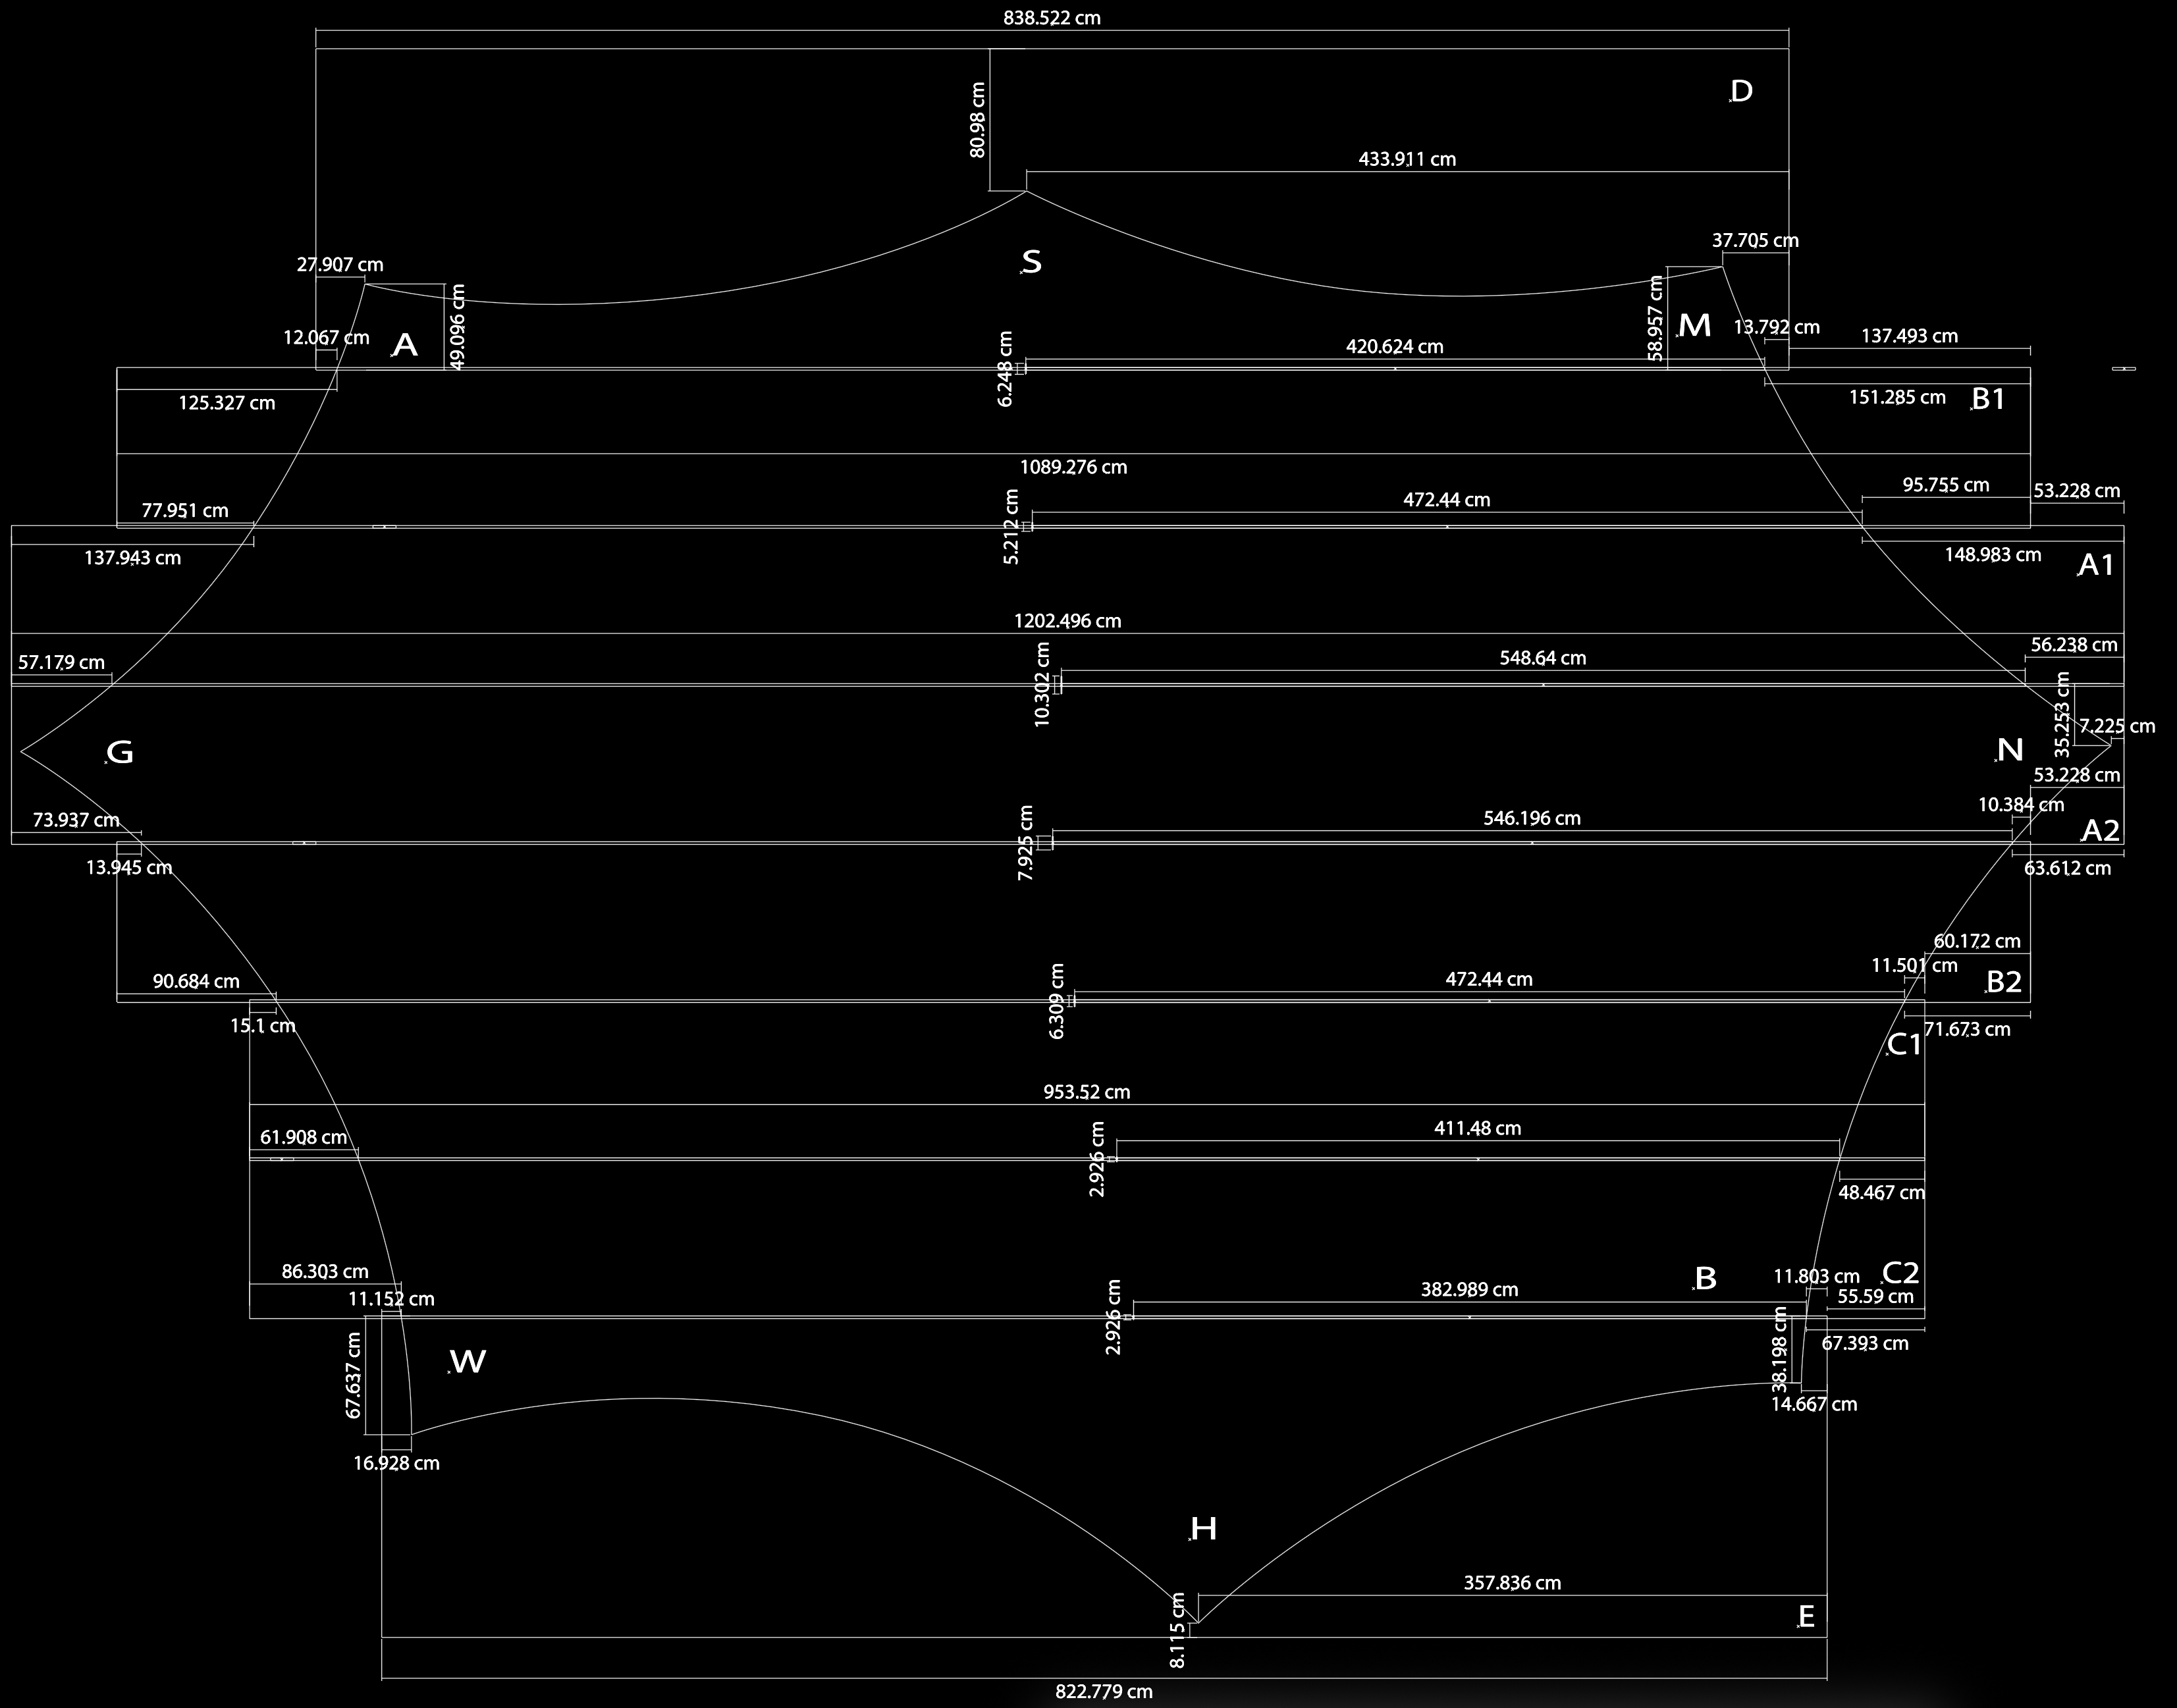
Every site-specific RainShade we make starts with a very detailed survey that has all sorts of measurements that are meaningful to us.
From that survey
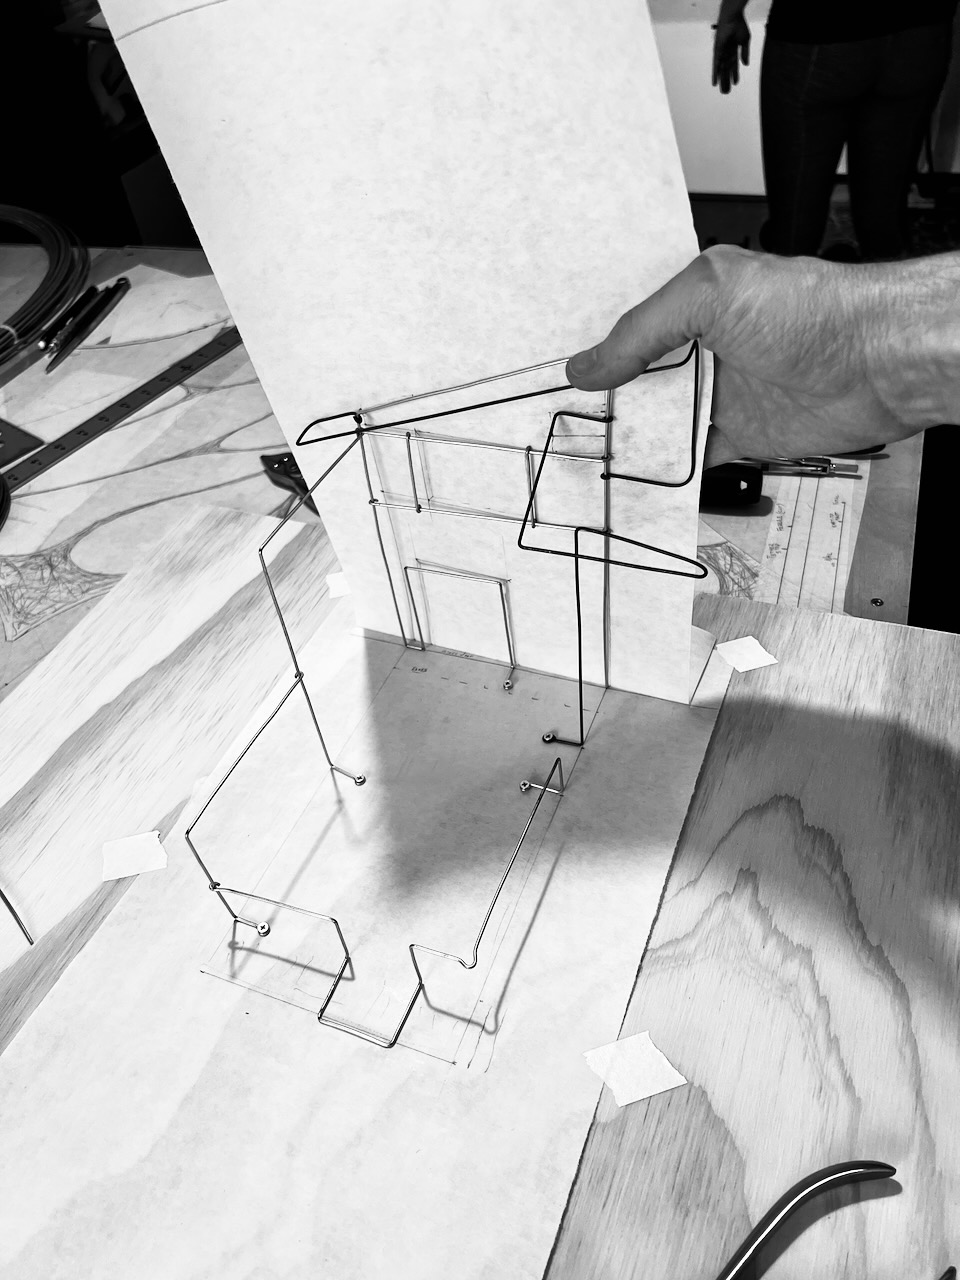
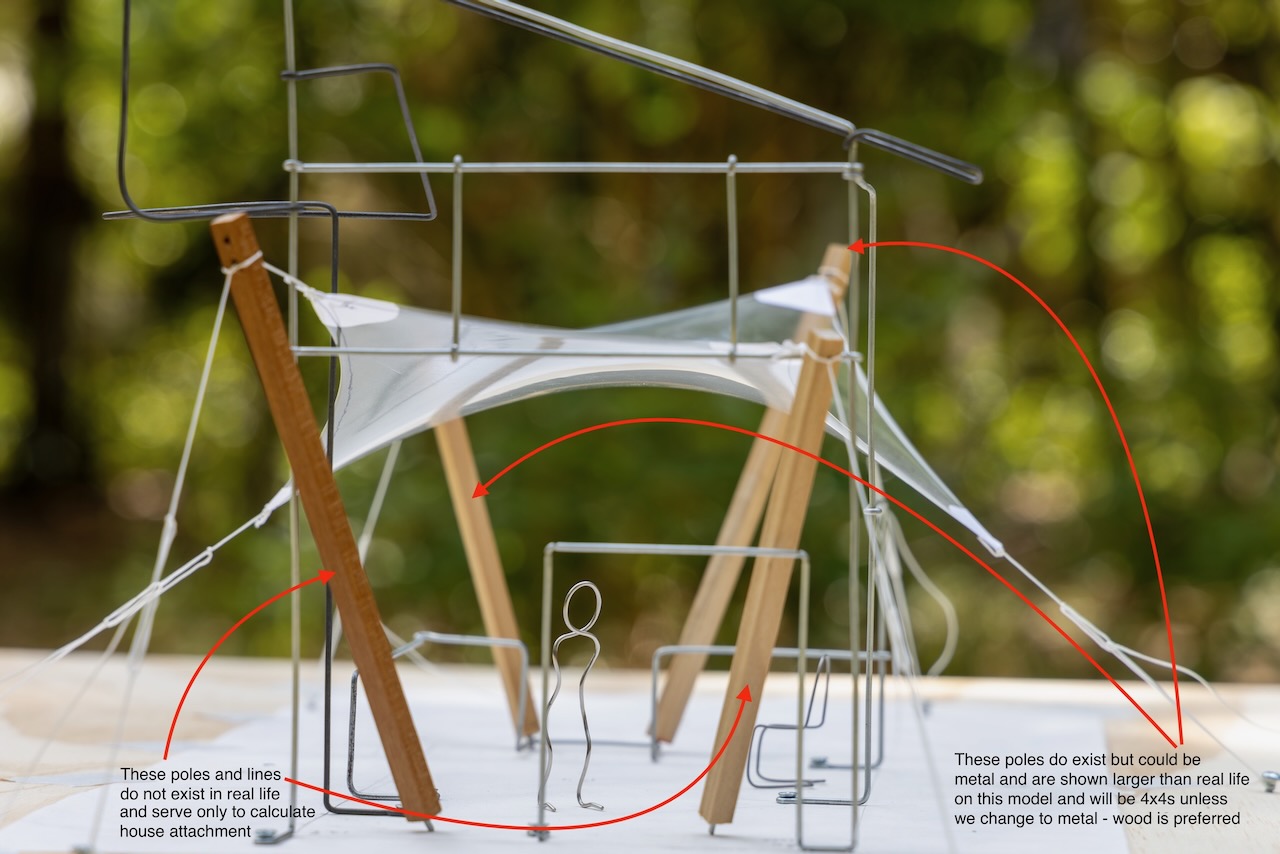
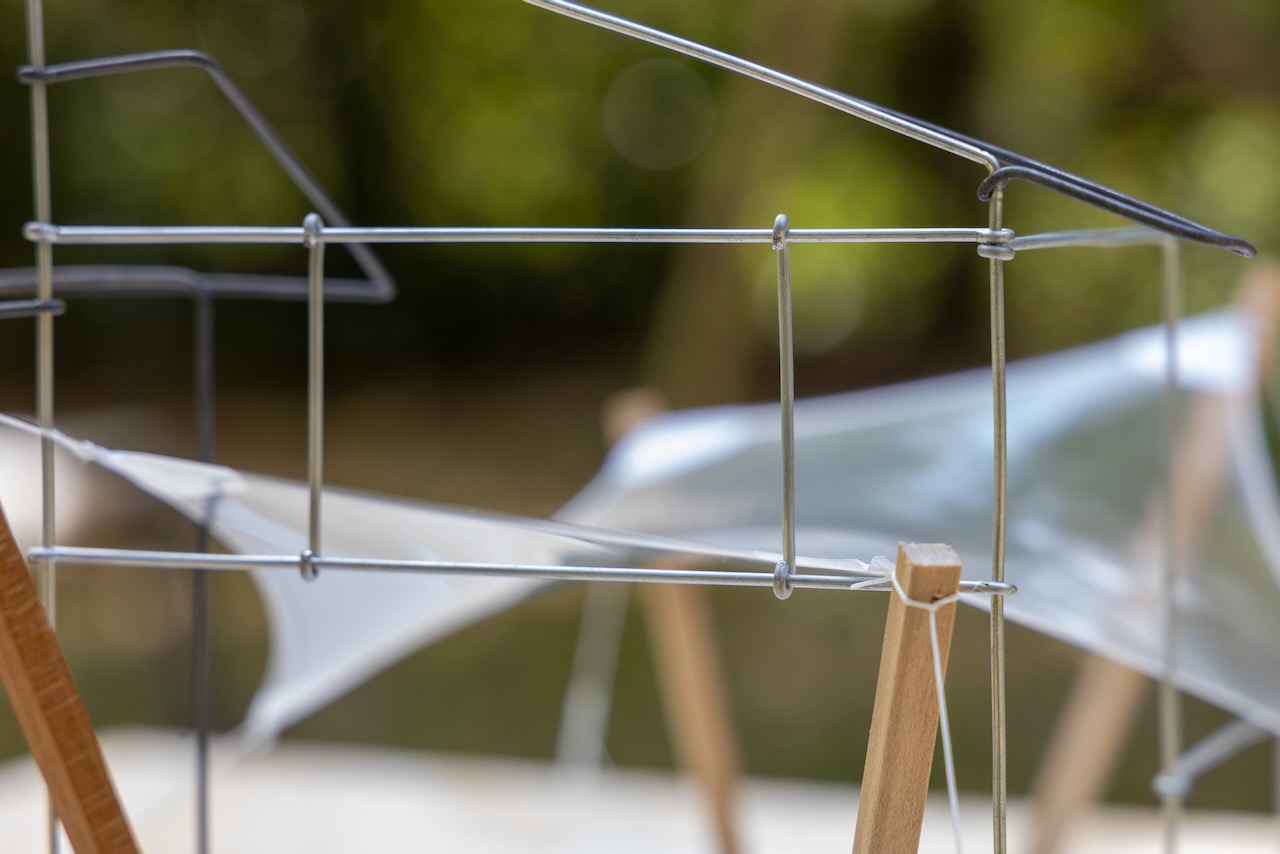
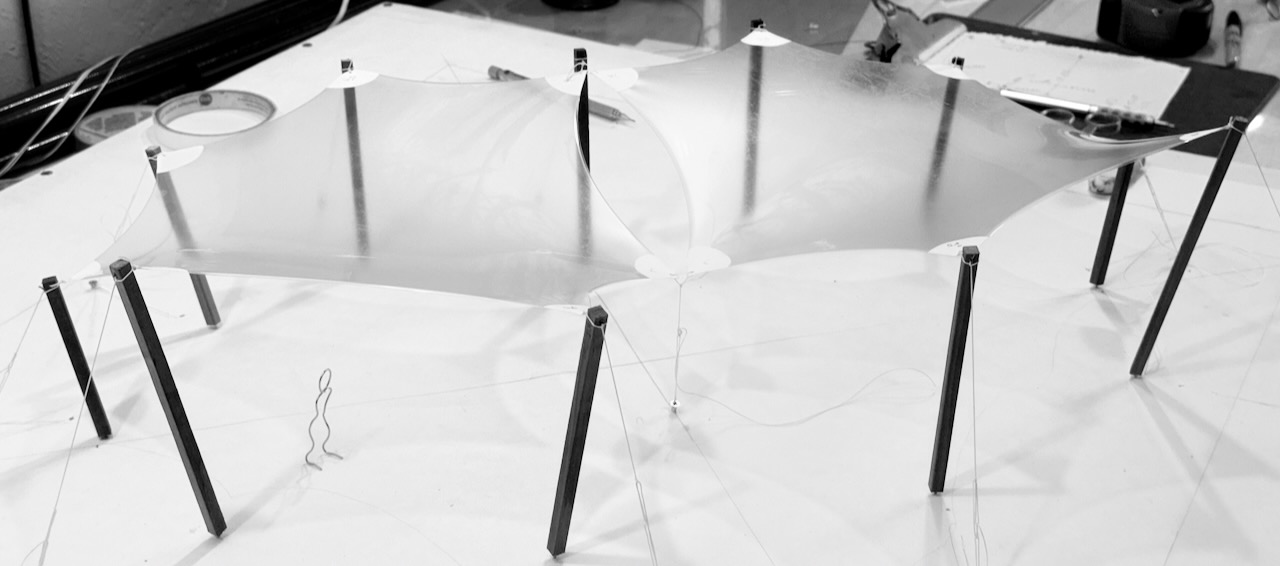
By hand, we craft an incredibly accurate model. On these models, 1 cm is 1 foot. In real life we work in laser-measured decimal feet. On the model, caliper-measured millimeter tenths.
Most architecture models are just foam, glue, and pretend materials. Not our models. Ours are working models. Every material that represents what we will fabricate is materials-faithful to the eventual real RainShade. This means the modeled RainShade will behave just like it does in real life.
Wood sticks on the model, wood posts in real life. Polymer film on the model, polymer architectural membrane in real life. Metal screw on the model, metal anchor in real life. Dyneema fiber tied on the model, dyneema fiber rope in real life. Even the knots are identical.
Great rules
make great projects
Every property seems to have it's own rules. Models make them discoverable.
Why not a computer model? Don't worry, that comes later. But the real answer is, because a physical model is better in just about every way.
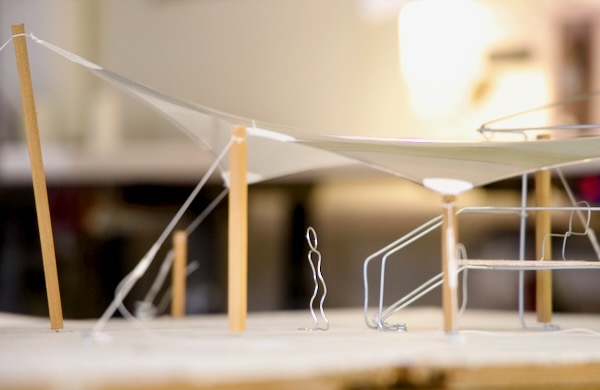
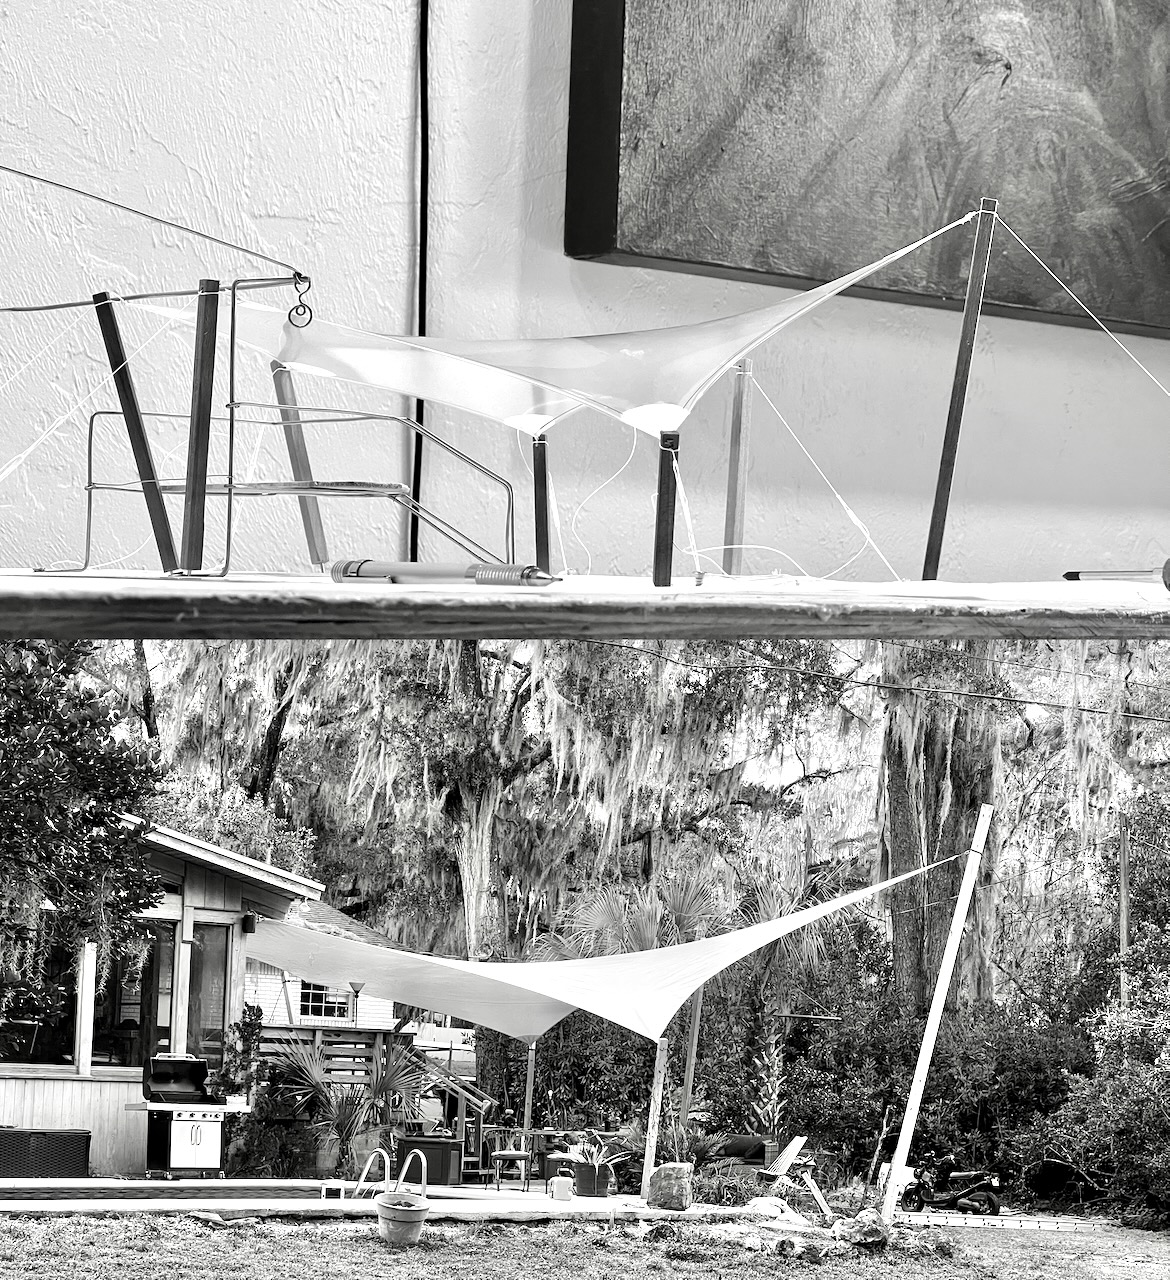
Out the window
Want to preview what your shade sail will look like? This is a view out of the bedroom window. The model shows everything.
Through that wire rectangle there, that's not a render. That's the actual view of the site's real trees, at the real angle.
Scale and compute
From real model, to real life
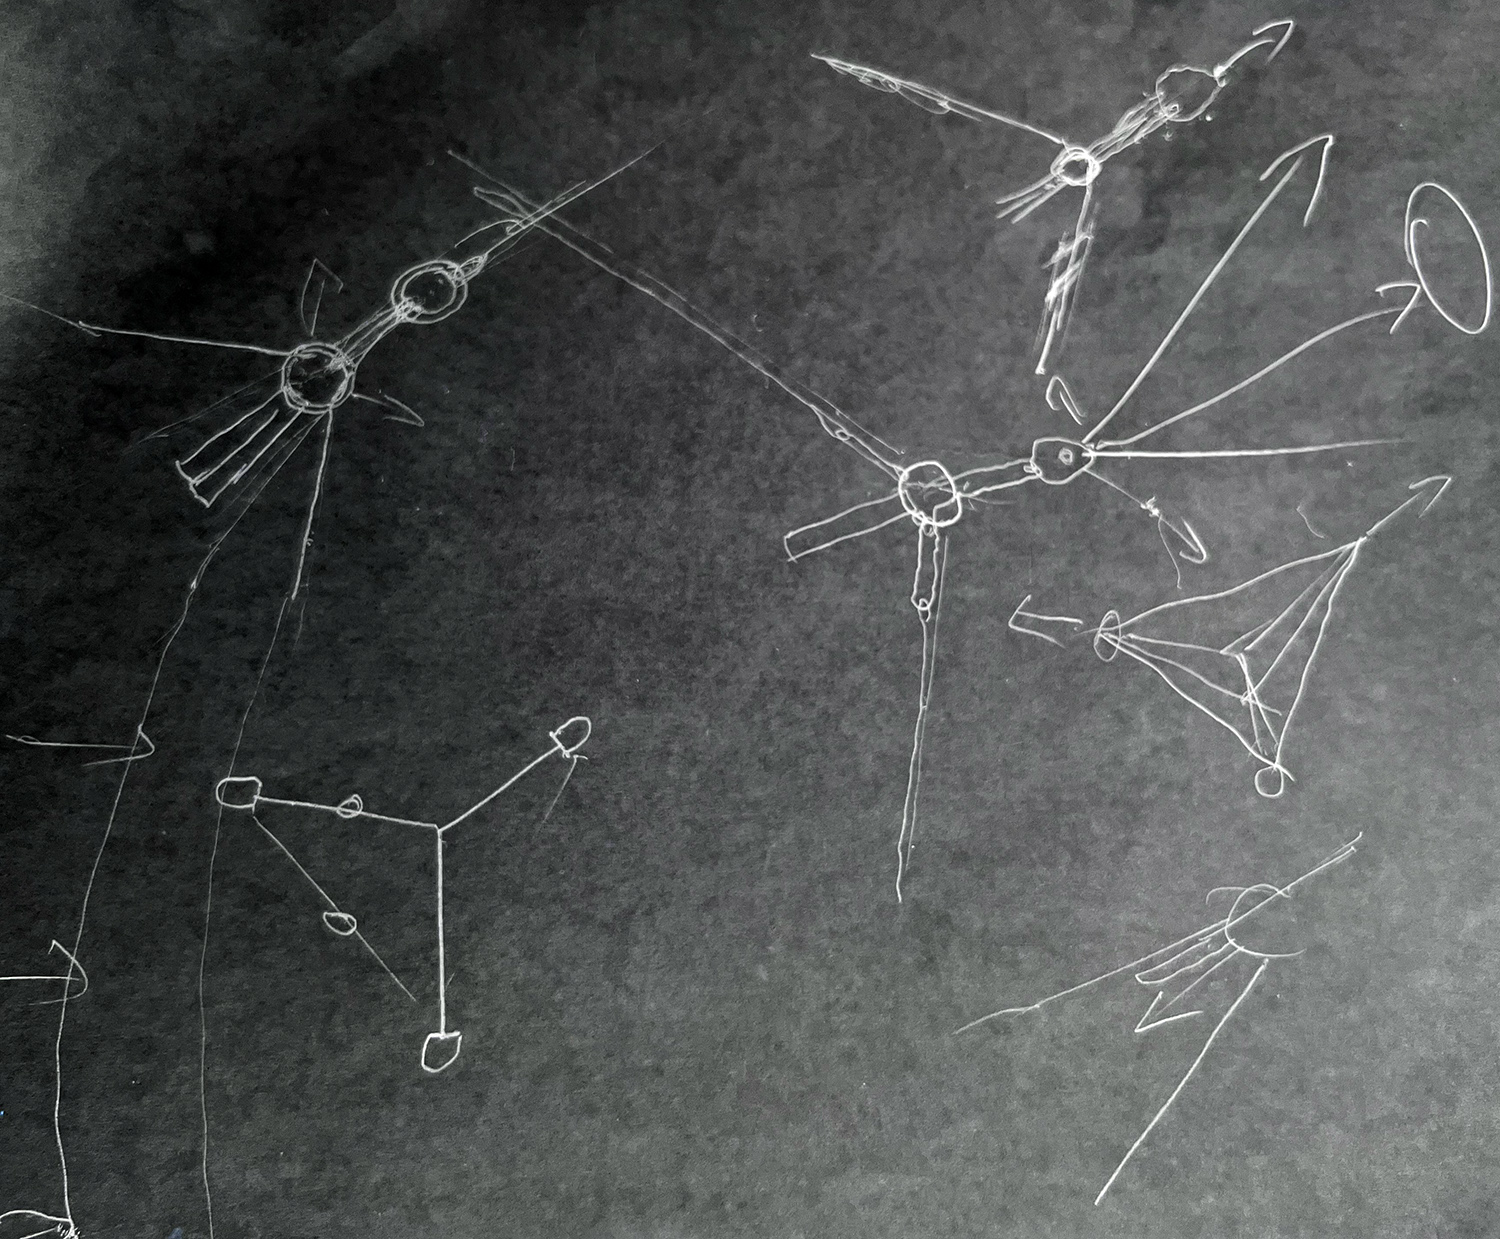
Wire frames
And sight lines
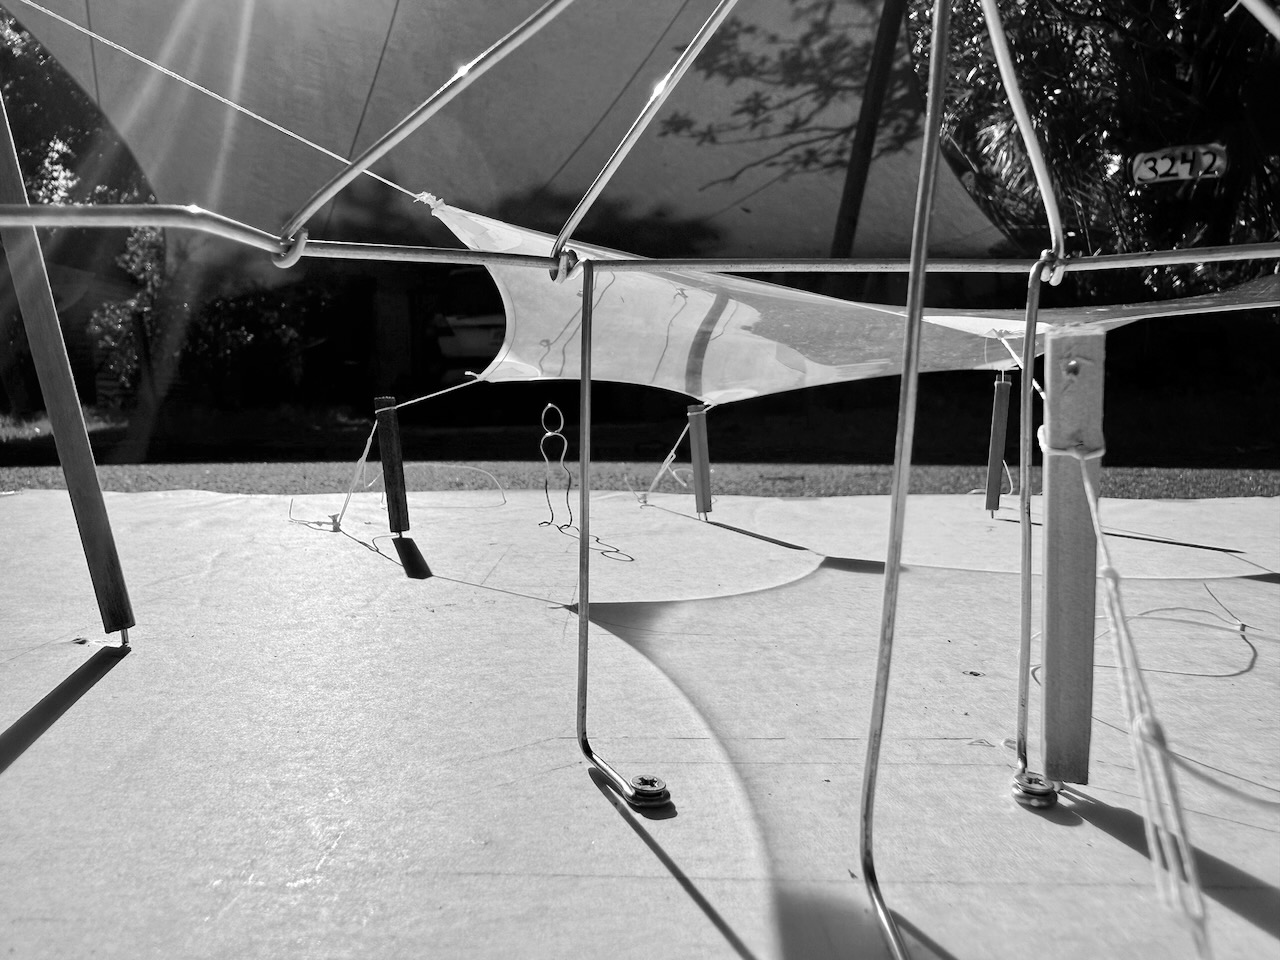
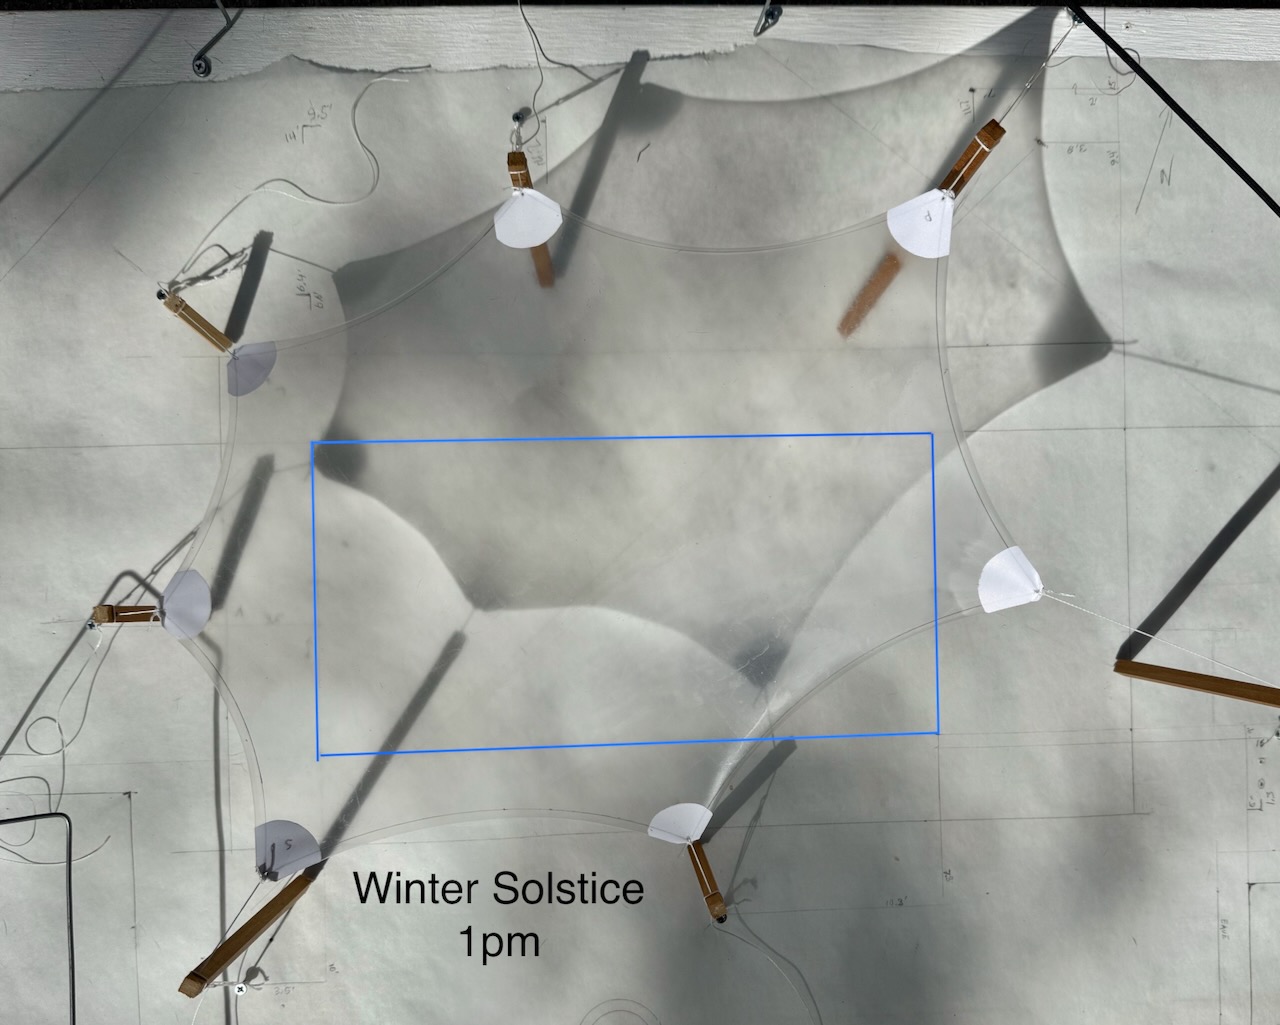
Projecting the sun
These models perfectly show actual shade lines on a property. Before deciding on the final design, we bring the model to the site and orient it North to North. It's like a sun dial that shows time of shade.
Shading a pool projected in summer and in winter.
Shade and sun designed to happen when you want them.
Here the model shows a blue outline of the pool, and the winter sun at the lowest angle it will be all year.
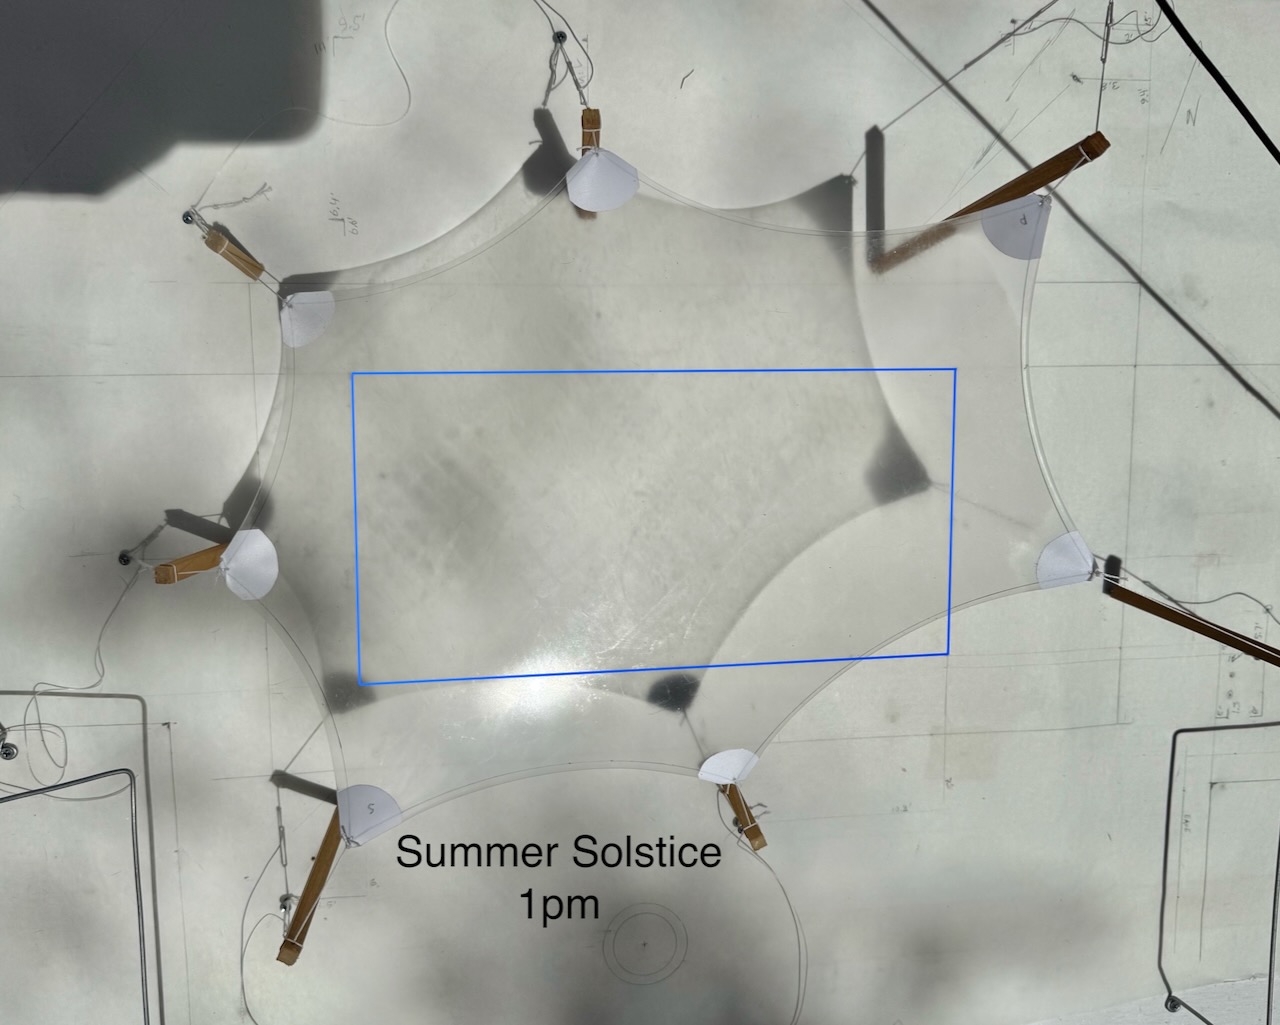
Here it shows the same pool and same RainShade design, but during summer, you want your water cool the shade is perfect.
Shape capture and design
Analog compute
We designed the whole tech stack
This whole process was developed by us in-house, from scratch, to make these possible. So, what all do we get from the model?
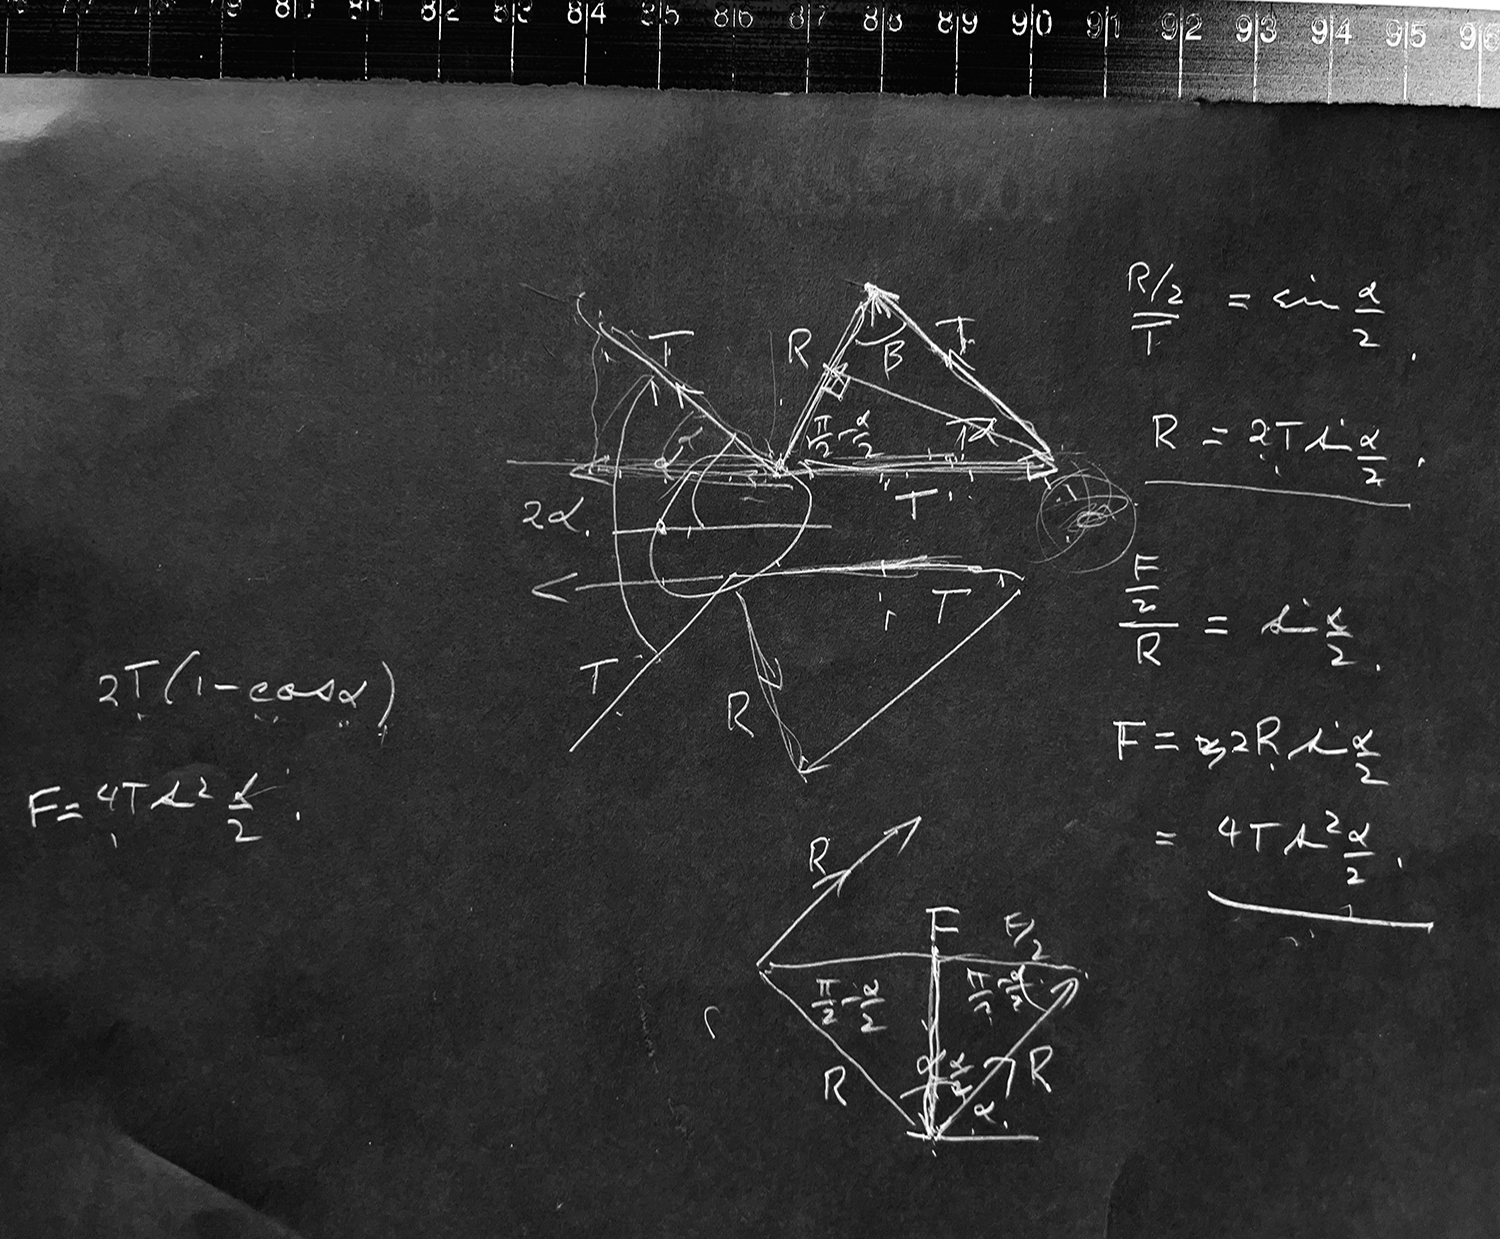
- Panel curvatures! Every centimeter of seam in the final product is part of a curve. RainShades have extremely precise curvatures. Minimum surface area calculations are hard, but not on our models.
- Pole lengths, footer placement, anchor placement accurate to within inches.
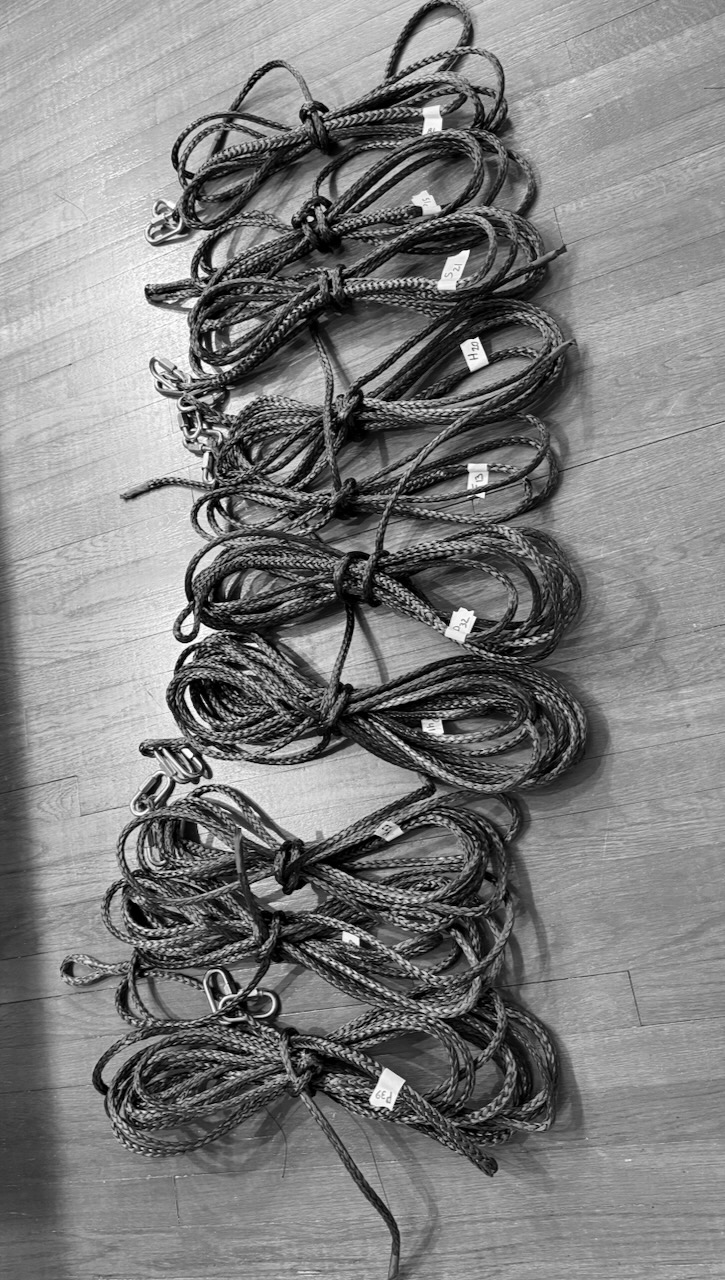
- Rope lengths, splice paths, angles, and tension information.
- Water runoff points, property features, service lines, doors, decks, walkways, everything important is on the model.
Digital compute
All the measurements for the digital model come from the physical one. So from our on-site laser measurements, to caliper-measured model, to computer model. This is where decisions like seam placement and material layup are made.
Accuracy from Precision
Scaling up happens digitally. As we know, anytime something is scaled up, we lose resolution and thus accuracy, as errors are magnified. So it's the perfect time to use a computer.

RainShade Construction
Curves on curves
Old-world sail making techniques make these complex shapes possible.
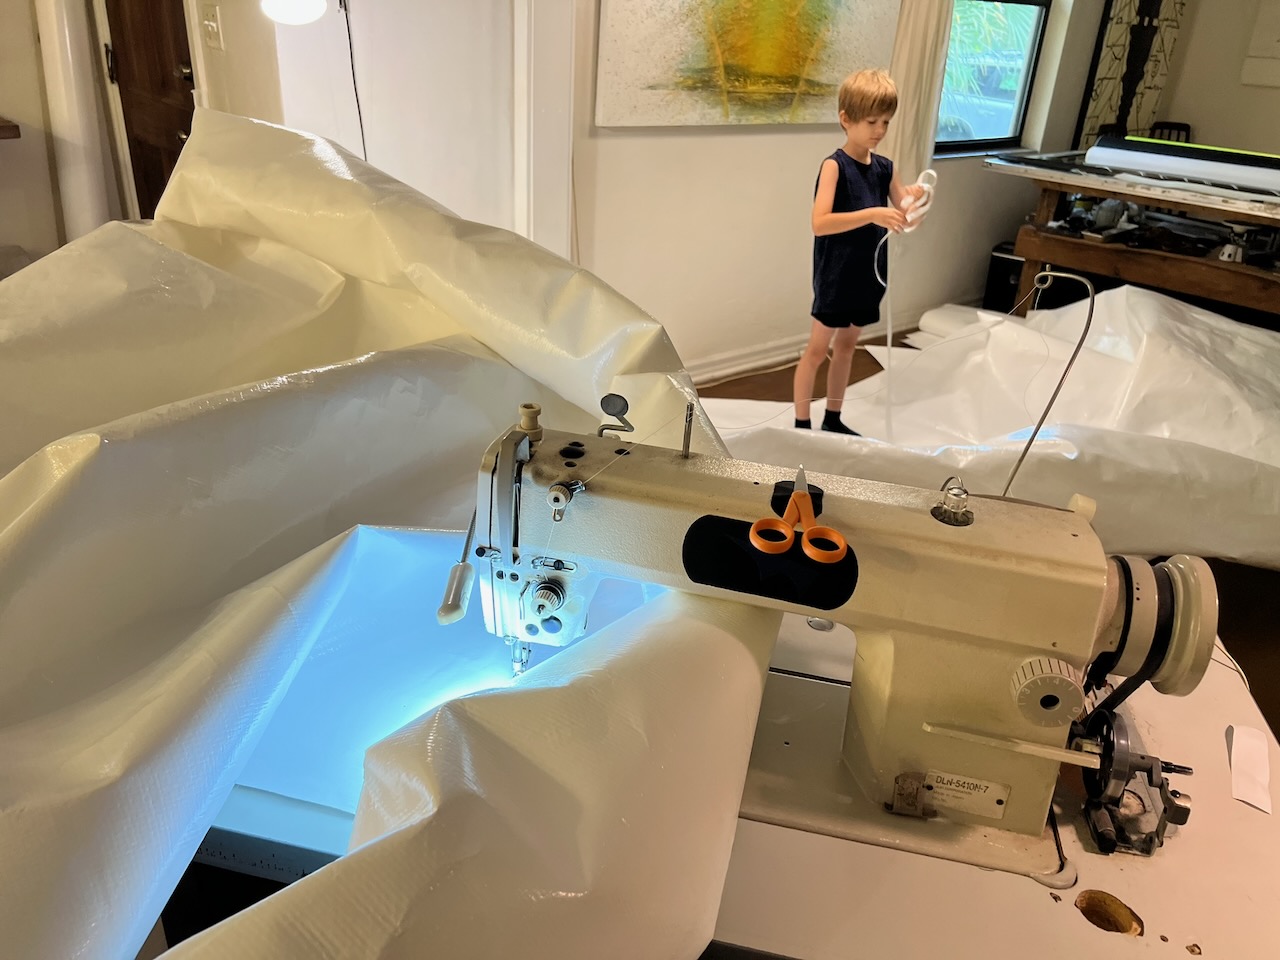
Move the machine instead of the work
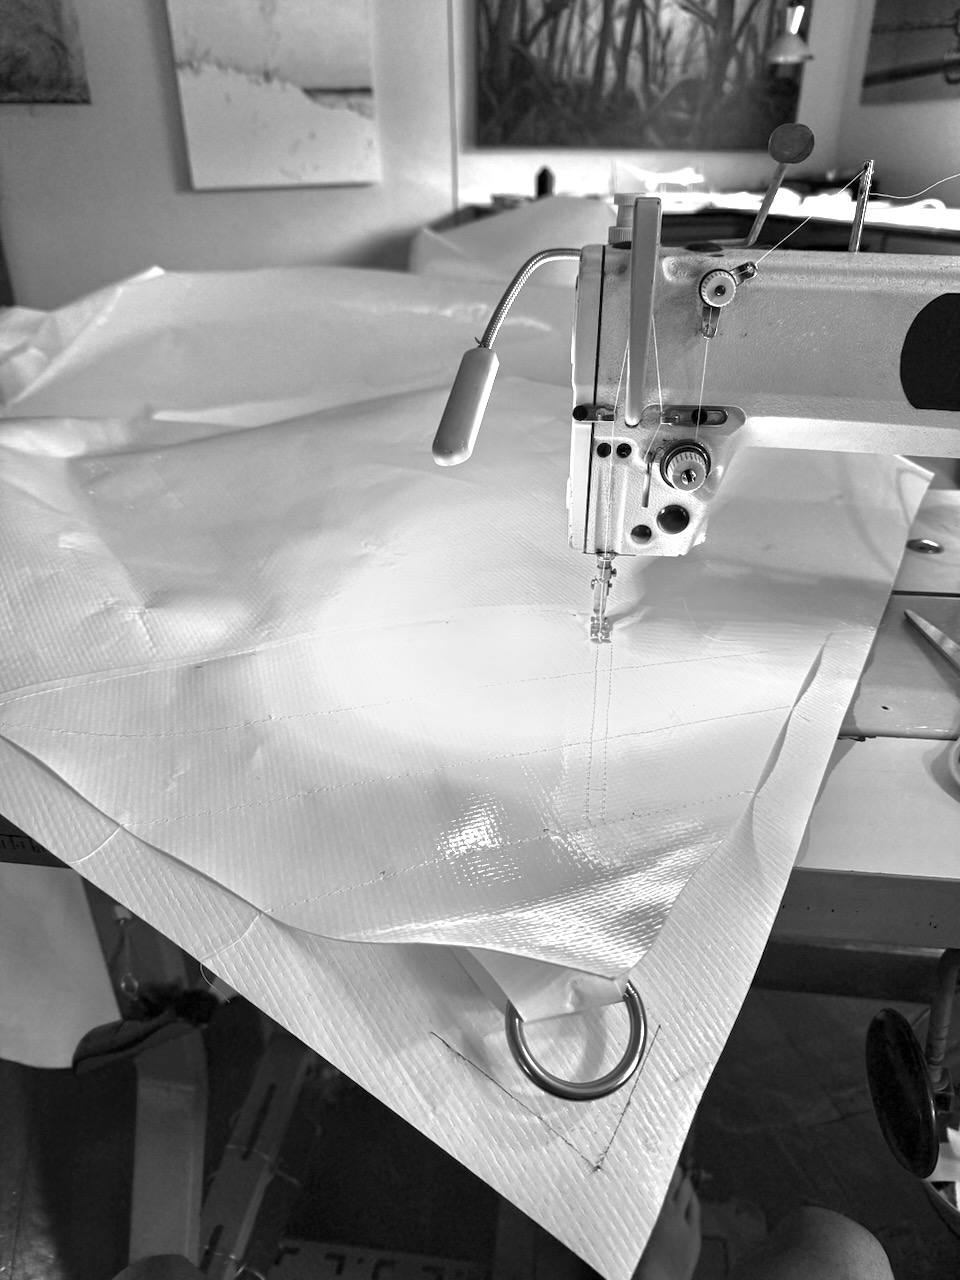
A big part of why these don't exist elsewhere is that the willingness to sew this stuff is exceedingly rare. Typically, it's welded not sewn. But this is maybe the biggest reason that we can make curved shapes from this membrane when others can't at all. The problem is the welding equipment for this membrane can use only heat. The hot-weld machines can only deal with straight lines. We solved this by hand-laying the long curves up and then sewing them. The material is just so, so stiff. We put our machine on wheels and move the machine down the seams. What you can see in that video of me sewing is the maximum speed it can be done. There is no possibility for faster. But remember, it's worth it because it's a 20 year panel I'm making.
Splice and sew everything
The miracle of the sewing machine can be seen in nearly every aspect of what we make. Not only do we love to sew, but also the tech is just unbeatable. Come on, micro-rivets every few millimeters? Yes. On these RainShades we use thread that is never influenced by ultraviolet. It's part of that amazing 20 year rating.
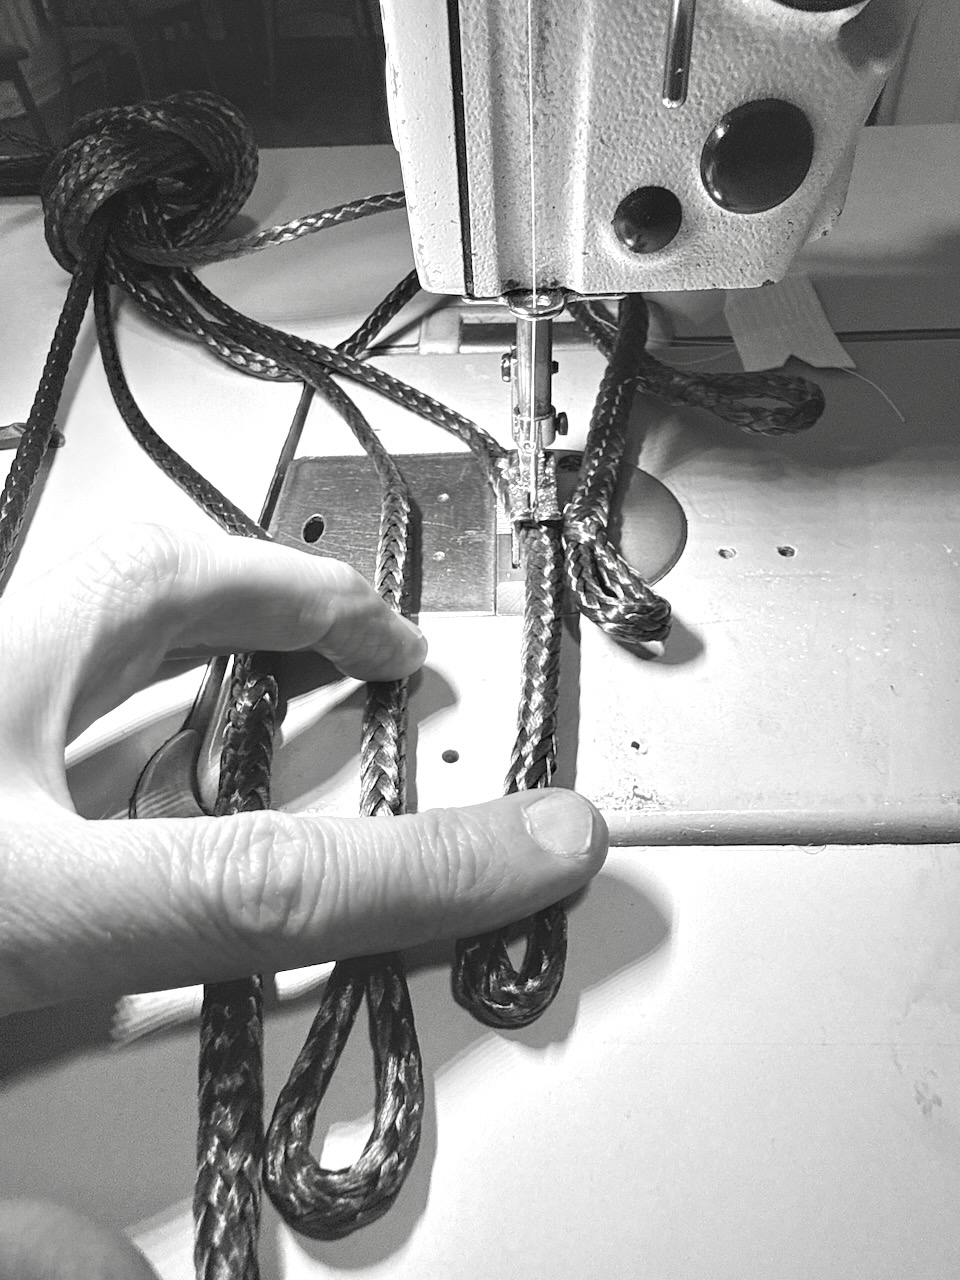
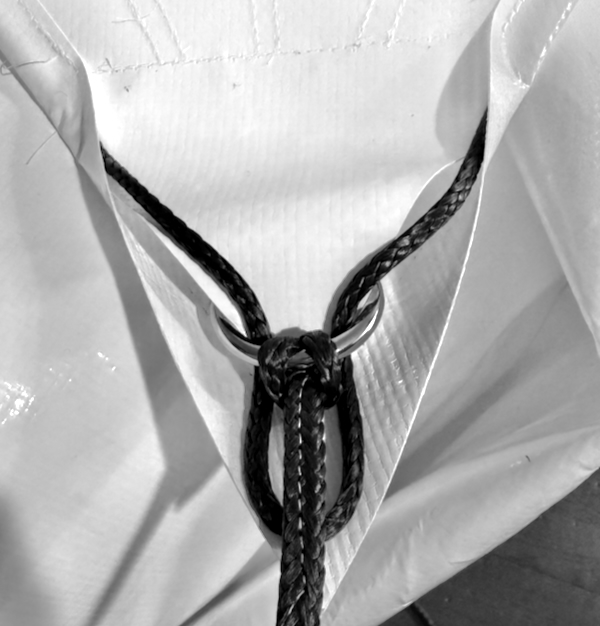
The points
Once all the panels are sewn together, the focus turns to the points. A lot of thought has gone into these. We use 316 stainless rings and UV-impervious lifetime thread. Every edge of RainShade gets a continuous 5000lb test zero-stretch line as well as an individual point line. These two lines can be balanced toegether to acheive perfect tension.
Every shop needs an assistant
RainShade sails are such a demanding sewing job. We coined the term athletic sewing. It's a bit like sewing on posterboard. Lucky that we have great help.